Getting started
PLEASE NOTE: These instructions refer to the version 1.01 of the game. They have to be updated to 1.02 to reflect the addition of teams and high detail/shader support. This will happen within the next few days.
When started for the first time, the game will most likely present you a request for collecting some configuration information and making an in game screen shot that both will be transfered to a remote server. If you choose ‘Yes’, you support the further development of the game by letting me know the target platforms better. No personal data will be transfered, i promise. If you choose ‘No’, it’s fine too and dialog won’t come up again. No data will be collected and transfered in that case.
The setup screen
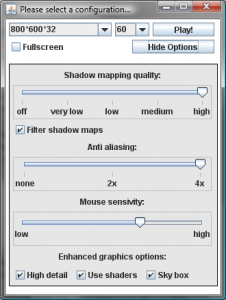
Before the actual game starts, the setup screen comes up. Here you can select the resolution, if you want to play fullscreen or windowed and tweak your detail settings to match your system’s capabilities. The advanced options are hidden by default. Click on “show options” to show them.
Your settings will be saved and reused until you change your graphics hardware. In that case, Robombs will adjust the settings to what it thinks is most appropriate to your system. This may not be right on the spot, so feel free to adjust them yourself afterwards.
You can also adjust your mouse’s sensivity here. Options that aren’t available on your system are greyed out.
The title screen
A very simple title screen. Read it once, if you want to. Otherwise, just click to skip it.
The server browser
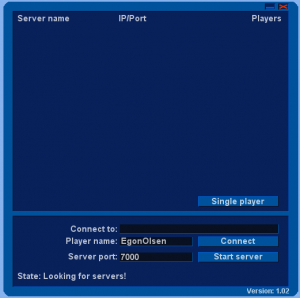
After the title screen, the server browser comes up. Here you can start your own server, join an existing one, change your name, start a single player game and quit the game.
Have a look at the screen shot above. You can see a list of servers running in your LAN. The server browser runs fixed on port 7002. If this port isn’t available on your client and on your server, your won’t see any servers in the browser.
To connect to a server, just click into the list and the server’s settings will be copied to the “Connect to” text field. Here you can edit them if needed (it usually isn’t) or specify your own server in case you don’t see a server in the browser but know the server URL. Use the IP:Port-format that you can see in the server list.
Now, click connect to connect to that server. If you haven’t selected one and there’s only one server in the list, Robombs automatically tries to connect to that one. If there is none, it tries to connect to localhost.
If you want to run your own server, simply click on “Start server”. Make sure that the port (default is 7000) is available or your server won’t start.
You may also change your name in the “Player name” text field or start a single player game by clicking on “single player”. A single player game is a multi player game with one human player, five bots and all maps in rotation. It’s just a short cut. The server port has to be available for the single player game too.
Like in all screens that follow, the red X in the upper right corner quits the game. The minimize symbol left from it closes the window. To bring it back, simply hit the “ESC” key on your keyboard.
The client screen
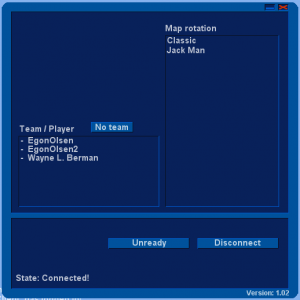
Once connected to a server, you’ll see the client screen. It’s very simple and doesn’t offer much choice.
You can see the current map rotation of your server, the current player list and two buttons. The left button readies/unreadies yourself. All players have to be ready for the server to start the game.
The right button lets you disconnect from that server. That’s all there is to do…
The server screen
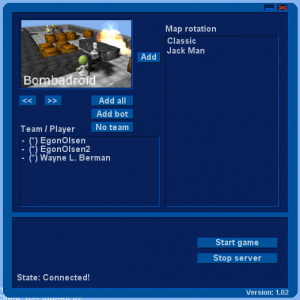
Setting up a server is bit more work than simply connecting to one. You have to edit the map rotation and may add bots to the game. Just have a look at the screen:
In the upper left corner, you’ll find an image of the current map. You can iterate maps by clicking on the arrow-buttons below that image. The “add”-button to the right adds the maps to the map rotation. You may add one map multiple times. To remove a map from the rotation, just click on its name in the list. To add all maps at once, click on “add all”. This will erase your former map rotation.
Below the map section, there’s the Player list. Here you can see all players connected. In this example, this is you and two bots. To add more bots, just click on “add bot”. The number of bots is unlimited in theory, but adding too much will render the game unplayable.
If there’s an asterisk before a name, the player has readied himself. You (as the one who has started the server) and all bots are ready by default.
To the right, there’s a button to stop the server. All clients will be disconnected and your server will be stopped once you click that one.
Below, there’s the “start game”-button. This may also be labeled “waiting” or “waiting (x)”. In the former case, your map rotation is empty, in the latter, x player have to ready themselves. You may still click on that button to send them a message that you want to start the game.


